Image to STLHow to UseTool OptionsFAQHow it WorksExamplesLatest NewsLatest Tutorials
to

Convert 2D PNG/JPG Images to 3D STL Mesh files!

Use our fast and free image to STL online tool to convert your PNG and JPG 2D heightmap images or logo into 3D STL (Standard Triangle Language) mesh/model files suitable for printing with a 3D printer, CNC machining or for loading into your favourite 3D editing package. To see some examples of what our tool can create, please see our examples section below.

Click on the "Upload a file" button above to begin. Your PNG/JPG image/heightmap should fit within 1200 x 1200 pixels, if it is larger than this the image will be resized to fit within this size. Once you submit your image it will be processed as quickly as possible. More complicated images may take longer than others so please be patient. For more information about how your image is converted into the final 3D model please see the section below How Does Image to STL Work?.

How to Convert your JPG or PNG to STL Online?

Here are three simple steps to create an STL file from a JPG or PNG file.

Upload a JPG or PNG

Click the "Upload a File" button and select an image file (PNG or JPG) to upload. The maximum file size is 100MB.

Select your Options

Set the dimensions and other options, and click the "Convert to STL" button to convert your JPG or PNG to STL.

Download your STL

Click the download link once completed to receive your STL file.

Image to STL Conversion Options

Tool

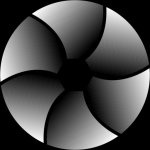
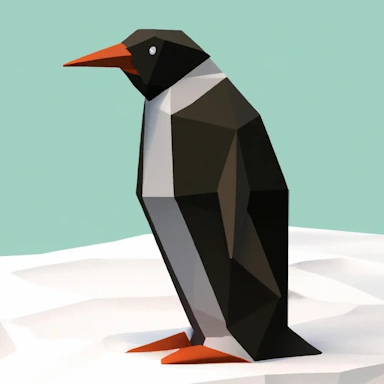
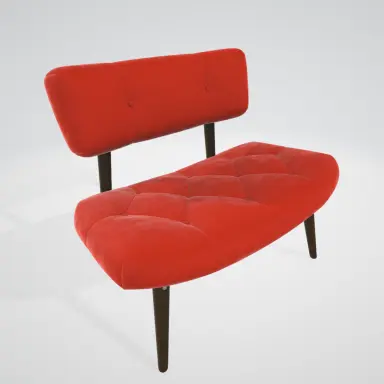
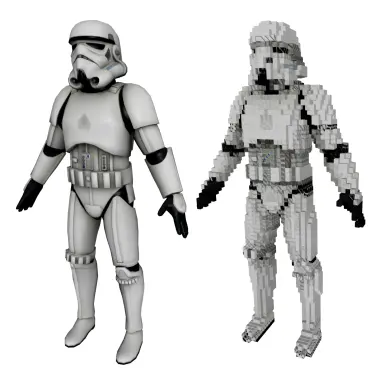
This setting allows you to specify how your PNG or JPG image is converted to an STL model. The Extrude options will extrude your image into 3D space, while the Standard options will apply a heightmap process to your image.

For more information about the differences between the Extrude and Heightmap modes and to see some examples, please see our How Does Image to STL Work section below.

Detail

The setting can be used to alter the detail of the final STL model that is created. The default setting of Medium works well for most Extrude and Heightmap conversions, with the High setting recommended for highly detailed image files.

Add Base

This setting, when given a height of more than zero, will instruct the tool to add a solid 3D base to the final STL model. The selected unit of measurement specifies the height of the base.
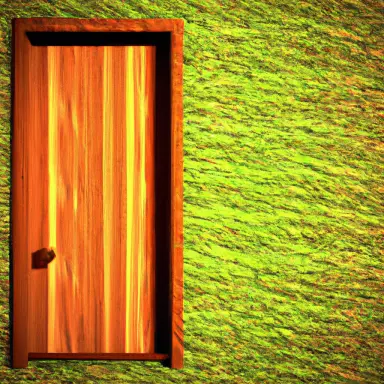
Invert Output

When the Invert Output option is checked, the pixel brightness is reversed, i.e., black becomes white and white becomes black, resulting in a 3D model that is reversed.

For an example of this option in use, we have some excellent example files below to try.

Units

This setting tells the tool how to size the final 3D model when using the settings below for Width, Height, and Depth settings.

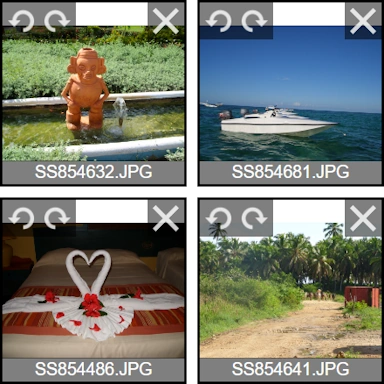
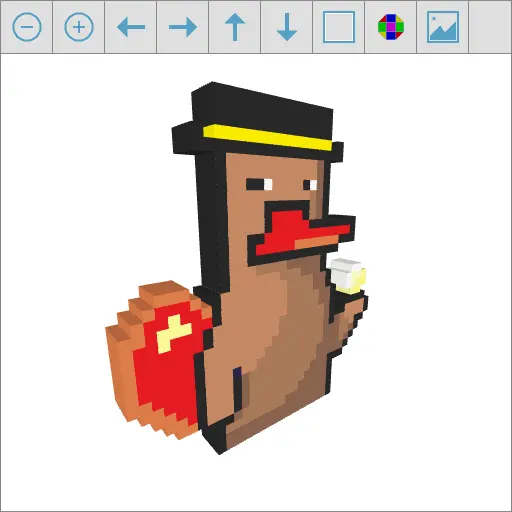
Upload Color Overlay

When using either the Color Extrude or Heightmap options within the Tool menu, you can optionally upload a separate image that can be used to colorize your 3D model.
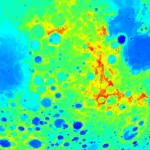
Color Conversion

This setting instructs the tool on how to interpret the color information of pixels in your image, thereby influencing the creation of the 3D STL model. The grayscale option is most commonly used when working with heightmaps, unless you are dealing with specific requirements that necessitate the use of color.

Merge Similar Colors

Use this value to merge similar colors; this is useful if the image is of low quality. A higher number can help reduce the effects of anti-aliasing in the PNG or JPG image.

Hole Reduction

With this setting, it is possible to reduce the inclusion of small holes within the 3D model caused by small, darker areas of the source PNG or JPG file, which can be useful in situations where the source image has not been optimized for use with the tool.

Transparency Conversion

When your PNG or JPG file has a transparent background, this option can instruct the tool on how to treat the transparency, with the transparency converted to either black or white.

Enable Smoothing

When this setting is enabled, the conversion tool will attempt to smooth out any "spikes" within the 3D model that are caused by contrasting pixels in the image being in close proximity to one another.

Z-Axis Mirror

With this option enabled, the tool will mirror the 3D geometry of the generated STL model along the Z-axis.

Generate Preview

If you would like the tool to create a 3D preview of your model, then please select this option. It is on by default.
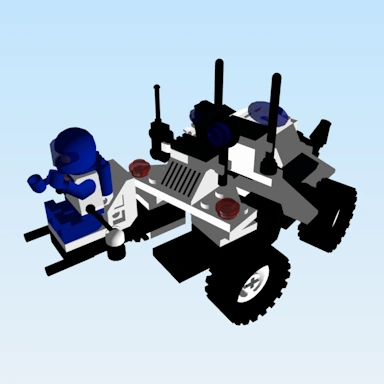
Save As 3D File

This option allows you to select a variety of 3D model formats. If you select a format that supports color materials and configure the tool options for color, it will create your 3D model with color elements.

STL Format

You can use this option to fine-tune the STL format the tool uses. Binary is the default option, as this is the most common format of STL file, with the other two formats supporting color, which is only useful if your 3D editing application supports color STL model files.

Image to STL Frequently Asked Questions

What does this tool do?

Our tool converts image (bitmap) data into 3D geometry, which is then saved to the common STL file format.

What files does it support?

The PNG to STL tool can convert the most common image file formats, such as PNG, JPG or any one of our supported image formats. The output is provided in STL format, which can be used in most 3D graphics applications.

How does the tool interpret the image pixel data?

3D geometry is created based on the luminosity of each pixel in the source image. For example, using the default tool settings, a black pixel represents a 3D pixel height of 0mm, and a white pixel represents a 3D pixel height of 10mm. Colors in between these will be converted to a 3D pixel in this range.

What does the "Invert Output" option do?

This option reverses the black-to-white range conversion, so with this option set, a black pixel will be rendered as a 3D pixel of 10mm in height, and a white pixel will be rendered as 0mm.

How do I control the Model detail?

The "Detail" option allows you to control the resolution of the created STL file. Low detail will generate the model quickly and result in a smaller file. The High option will take longer to generate and can result in very large download files.

What does the "Enable Smoothing" option do?

With this option, the PNG to STL converter will attempt to remove or smooth out any spikes in the resulting STL 3D model. Spikes are usually caused by highly contrasting adjacent pixels in the source PNG file.

What is the maximum PNG resolution I can upload?

The PNG you upload can be any size; however, our tool will resize your image to a maximum of 800x800 pixels for normal users, and for premium subscription holders, this is increased to a maximum of 1200x1200 pixels.

Other Frequently Asked Questions

How can I convert my PNG file to STL?

First click the "Upload..." button, select your PNG file to upload. Select any configuration options. When the PNG to STL conversion has completed, you can download your STL file straight away.

How long does it take to convert my PNG to STL?

We aim to process all PNG to STL conversions as quickly as possible, this usually takes around 5 seconds but can be more for larger more complex files so please be patient.

How accurate is the PNG to STL conversion?

We aim to create the most accurate conversions with our tools. Our tools are under constant development with new features and improvements being added every week.

Is it safe to convert my PNG to STL on ImageToStl.com?

Yes, of course! We do not store the PNG file you submit to us. The resulting STL file, once created is deleted 15 minutes after upload and the download link will expire after this time.

Can I convert my PNG to STL on Windows, Linux, Android, iOS or Mac OS?

Yes! Our PNG to STL tool will run on any system with a modern web browser. No specialist software is needed to run any of our conversion tools.

What if I am using an Ad Blocker, will that affect things?

Yes. Although you can use an Ad Blocker, if you like our PNG conversion tool please consider white-listing our site. When an Ad Blocker is enabled there are some conversion limits on some of our tools and processing/conversion times will be longer.

Can I get support with converting my PNG to STL?

Yes. When you have converted your PNG to STL, there is a "Feedback" option that you can use to let us know of any issues you encountered when converting your file.

What is an STL file?

The STL file format describes an unstructured triangulated surface of the triangles using a 3D Cartesian coordinate system. STL files do not contain any scale information, and the units are arbitrary. We have a more detailed description of an STL file here.

What STL formats can I convert to?

Our tool will save all STL files in binary format. Optionally, our tool will allow you to save to the non-standard color STL format.

How Does Image to STL Work?

Standard Mode (Heightmap)

The process is simple: After converting your image to greyscale, in Standard mode, our tool examines your 2D PNG or JPG (heightmap) image and based on the brightness of each pixel, will create a corresponding "3D" pixel where the height of the pixel is determined by the pixel luminosity. A black pixel will have a height of 0mm and not be included in the final 3D generated model, however a white pixel will have a height that you specify once your image is uploaded.

When using the Extrude Color mode the tool works in the same way as the Standard mode however the way the tool interprets the pixel color information changes and also the final generated model will contain the color data overlayed onto the model. Please see our Generate Full Color 3D Heightmap Models From Images article which explains this process in more detail.

An original color height PNG image

An original color height PNG image

The heightmap converted to a color 3D heightmap model

The heightmap converted to a color 3D heightmap model

Another view of the 3D heightmap model

Another view of the 3D heightmap model

Extrude Mode

In Extrude mode our tool traces around the edges found in your image and creates simple but clean 3D models from the image, great for simple images. The Extrude Color mode also creates clean 3D models however instead of varying the model height based on the pixel brightness, the pixel color is used directly in the final model to provide color.

Simple shape to extrude

Simple shape to extrude

The swirl image is converted to a 3D model

The swirl image is converted to a 3D model

The tool creates clean and smooth edges in the 3D model

The tool creates clean and smooth edges in the 3D model

Finally...

The 3D STL file created by our tool can be printed with a 3D printer or if you would like to process the model further, it can be loaded into most 3D mesh editing packages such as Blender etc. For 3D videogame/application developers this is a useful tool for creating 3D mesh files from heightmap images for use in your games and other 3D applications.

Image To STL Examples

Here we have put together some example images and their resulting 3D-generated models to give you an idea of what can be created with our Image to STL tool. We have examples of both the Heightmap and Extrude options in use, as well as grayscale and color images.

1. Swirl Pattern (Extrude)

Here is a swirl pattern demonstrating the tool's ability to create fixed-height 3D models from simple black-and-white images using the Extrude mode. When constructing the STL 3D model, our converter will apply a height of 10mm to the geometry where it finds a white pixel and 0mm to any black pixels.

A swirl pattern

A swirl pattern

The swirl extruded to a 3D model

The swirl extruded to a 3D model

The swirl extruded to a 3D model close up view

The swirl extruded to a 3D model close up view

2. Gray-Scale Terrain Image (Heightmap)

This is a complex two-dimensional heightmap image, demonstrating the ability to create variable-height 3D models based on gray-scale images. When constructing the 3D model, the converter will apply a height of 10mm to the geometry where it finds a white pixel and 0mm to any black pixels. All shades in between will be represented proportionately in the final STL 3D model.

A Heightmap from a NASA shuttle mission

A Heightmap from a NASA shuttle mission

The heightmap image converted to a 3D model (front view)

The heightmap image converted to a 3D model (front view)

The heightmap image converted to a 3D model (back view)

The heightmap image converted to a 3D model (back view)

3. Inverted Gray-Scale Swirl (Extrude)

Here, we use the same image as in the first example and choose the "Invert Output" checkbox option. This reverses the resulting geometry and may be useful in some situations.

A swirl pattern

A swirl pattern

The swirl extruded to a 3D model

The inverted swirl extruded to a 3D model

The swirl extruded to a 3D model close up view

The inverted swirl extruded to a 3D model close up view

4. Extrude Color Logo

Here, we are using the Extrude (Color) mode to convert a color logo into a 3D model ready for editing within Blender. The Extrude (Color) is only available to 3D file formats that support color, such as OBJ, DAE, GLB, FBX and 3MF.

The logo for a Gameboy Color

The logo for a Gameboy Color

The logo converted to 3D

The logo converted to 3D

The logo converted to 3D close up view

The logo converted to 3D close up view

5. Heightmap Color

This example demonstrates how to create a color heightmap from a simple colorized image source. The colors in the source image determine the height of the corresponding pixel in the resulting 3D model STL. For example, in the "Color Heightmap" mode, dark blue represents the lowest part of the model and red the highest, while in the "Full Spectrum Heightmap" mode, white represents the highest point.

An original color height PNG image

An original color height PNG image

The heightmap converted to a color 3D heightmap model

The heightmap converted to a color 3D heightmap model

Another view of the 3D heightmap model

Another view of the 3D heightmap model

© 2024 ImageToStl. Convert your PNG and JPG Files to 3D STL files.

Your files are ready to download!